Family Resource Centre

  • Home
  • About
    • Our History
    • The Team
    • Board of Directors
    • Supporters
    • Testimonials
  • Programs
  • Guidelines
    • Program Guidelines
    • Health Policy
    • Frequently Asked Questions
  • Calendar
  • Blog
  • Donate
  • Resources
  • Contact

Summer Outdoor Art Activity #4: DIY Sidewalk Foam Paint

August 10, 2018 by Creating Together

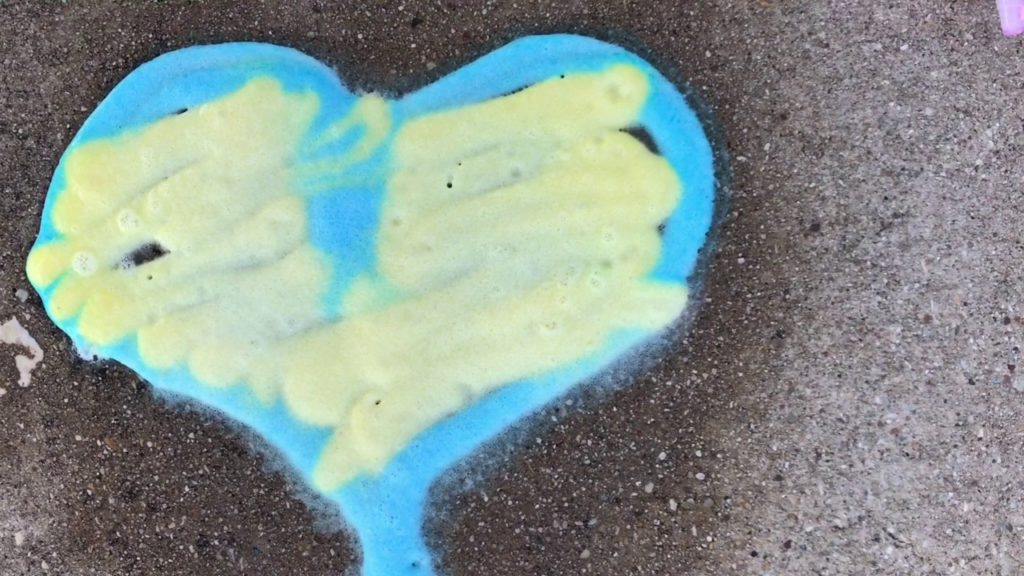
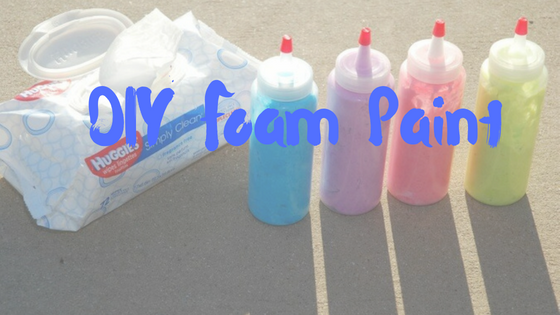
Here’s an outdoor art activity, courtesy of The Tiptoe Fairy, which uses ingredients you’ll probably already have around the house, and rest assured – it is easy to clean up with wipes and water!

Supplies:

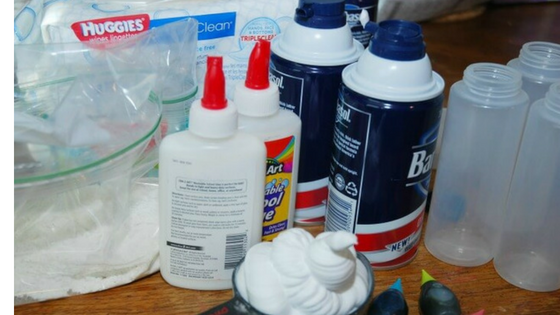
  • Two 4 oz. bottles of WASHABLE school glue
  • 1 cup white flour
  • 4-5 cups plain white shaving foam
  • food coloring drops
  • 1 gallon plastic zipper bag
  • sandwich-sized plastic zipper bags – 1 per food coloring
  • scissors
  • Optional: plastic squirt bottles (such as used for tie dyeing)
Courtesy of “The Tiptoe Fairy”

Let’s Make Some Foam!

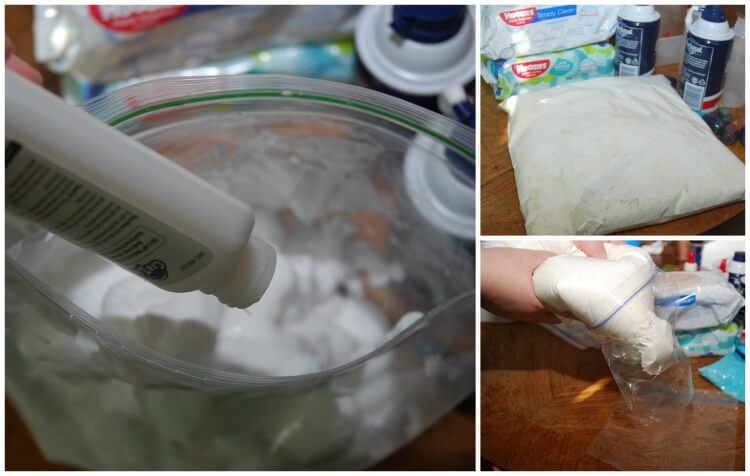
  1. In a gallon-size plastic zipper bag add 1 cup of flour.
  2. Pour both bottles of washable school glue on top of the flour. Make sure it’s washable for easy clean up!
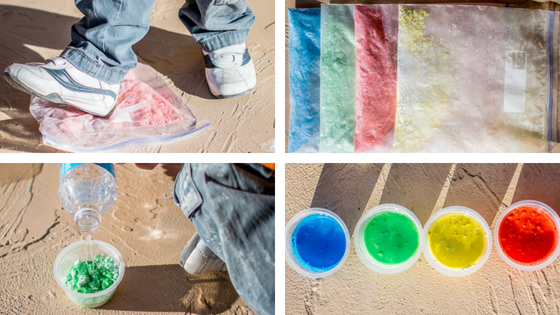
  3. Spray about 4-5 cups of shaving foam into the bag.  At first I attempted to measure it in a measuring cup, but it was ridiculous trying to get it out of the measuring cup.  So, after the first cup, I just eyeballed it.
  4. Close the bag and knead it for a few minutes until everything is totally mixed.
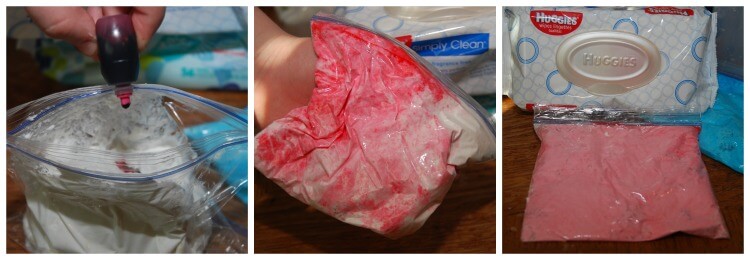
  5. Snip one corner of the big bag and squirt into sandwich-sized plastic zipper bags to divide it up per color. I went with four neon food coloring bottles, so I divided it up into 4 smaller bags. One each of blue, purple, pink, and green.
  6. Add 10 drops of one food coloring to each bag.
  7. Knead each smaller bag until color is throughout all the bag.
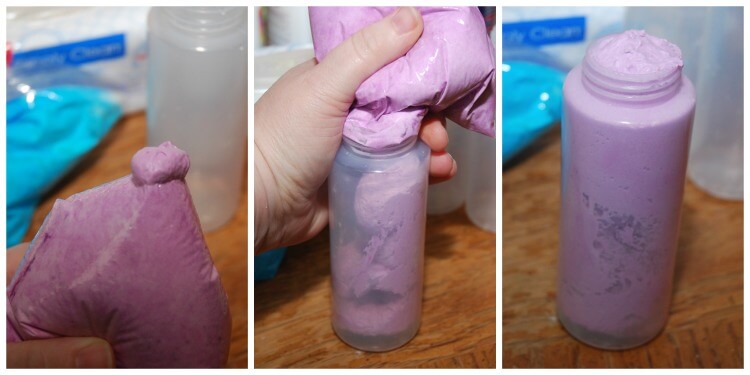
  8. Snip off the edge and squirt it into plastic squirt bottles. Or you can be frugal and just paint with the zipper bags.  If you keep it in the bags, just snip off a tiny corner, so it doens’t come out too heavy.

Filed Under: Uncategorized

Summer Outdoor Art Activity #3: DIY Chalk Paint

August 3, 2018 by Creating Together

Looking for a new use for all that sidewalk chalk? Here’s a cool way to use it up and have a good time while doing it!

Courtesy of “Busy Toddler”

What You’ll Need:

  • Chalk sticks – broken up preferred.
  • Water.
  • Ziploc baggies.
  • Hammer or mallet (optional).

Let’s Make Paint!

Separate different colours of chalk into each of the ziploc bags, crush them up with your feet or a hammer, and pour the powder chunks into cups. Top up with water, and paint away!

Courtesy of “Busy Toddler”

Filed Under: Family Playtime, Tips and Tools

Summer Outdoor Art Activity #2: DIY Nature Paintbrushes

July 27, 2018 by Creating Together

Here’s a craft to get you outside, go on a hike, collect some beautiful and interesting textures from nature and start painting!

These DIY nature paintbrushes are great for toddlers, preschoolers and also for older kids.

Courtesy of Messy Little Monster

You will need:

  • Sticks (1 for each paint brush)
  • Lots of interesting pieces of nature
  • Elastic bands (or string)
  • Poster paint
  • Large roll of paper

Collecting your nature for this activity is half the fun: find different textures and patterns, talking about what will make good prints.

How to make your paint brushes:

Attach a piece of nature to each stick using an elastic band or a piece of string. Start by attaching the string or band (not too tight), and then slide your nature selections in.

Time to Paint!

Lay out a roll of paper and 2-3 pots of paint with different colours in them. Experiment and play with the different patterns and textures each of the paintbrushes can create – dab, sweep, poke…and have FUN!

Filed Under: Family Playtime, Tips and Tools

Deep Gratitude to Mackenzie Investments

July 24, 2018 by Creating Together

Filed Under: Announcements

Summer Outdoor Art Activity #1: Cotton Ball Splat-Art!

July 20, 2018 by Creating Together

Here’s a MESSY outdoor art project to try out with washable kids paint – and don’t forget a paint shirt!

Try it on canvas & add a pop of colour to your home!

Courtesy of “A Crafty Living”

You Need

  • Washable Kids Paint
  • Rubber Mallet
  • Butchers Paper
  • Cotton Rounds

To Make

Step 1. Lay out a large sheet of butchers paper, ensuring to cover a large area! (Things are about to get real messy!)

Step 2. Place blobs of paint (about half the size of the cotton round) over the paper and cover each blob with a cotton round.

Step 3. Now comes the fun part! Swing your mallet and smack it into the cotton round!

Step 4. Once you’re finished, remove the cotton rounds and allow to dry. Now you’re ready to hang your splatter masterpiece!

Filed Under: Family Playtime, Tips and Tools

  • « Previous Page
  • 1
  • …
  • 33
  • 34
  • 35
  • 36
  • 37
  • …
  • 52
  • Next Page »

About Us

Our Programs

Guidelines

Resources

Creating Together Parkdale Family Resource Centre

Our mission is to support the healthy social, cognitive, emotional and physical development of children 0 to 6 years and their families. We welcome children aged 0 to 6 years and their families/ caregivers to relax and connect with each other and with the greater communities through our many programs.
Learn more »

Now Open for In-Person Program!

Sign up to receive our monthly calendar

  • This field is for validation purposes and should be left unchanged.

Hours

MON 9:00am - 2:30pm
TUE 9:00am - 2:30pm
WED 9:00am - 2:30pm
THU 9:00am - 2:30pm
FRI 9:00am - 1:30pm
SAT 10am - 2:00pm (twice monthly)
SUN Closed

Please refer to our Calendar »

Contact Us

Creating Together
1342 Queen Street West
Phone: (416) 537-1004
Send us a message online »

Charitable Registration Number:
12947 6248 RR0001
  • Email
  • Facebook
  • Instagram
Privacy Policy
Copyright © 2025 Creating Together · Log in